We all have a handful of framed photos on our walls, but beyond printing some portraits of friends and vacation shots, what else can you do with your photos and your camera? The camera you own is a art machine. It’s capable of all sorts of things.
Today we’re going to talk about filling your home with all sorts of creative visual pieces. From using your camera to further enhance the photos your already have, to creating interesting, new and exciting work. Treat this as a jumping off point for your new interior decorating project!

Mats
You’ve got to wrestle those pictures down and make them tap out on the mat. Wait… that’s not the right kind of mat, is it?
A mat is simply a border to give your photo some breathing room. They are especially useful to set the photo apart from colored or patterned walls, and usually, they are incredibly boring. You can create mats yourself. Once you do, you can use it on a photo or use it to mat another type of artwork like a painting.
Matching Room Designs
You can match your mat to designs in your home. In my house, I have a tiled ceiling. I used my camera to photograph this pattern and use it as a mat. This pattern as a lot of straight lines, so to keep them straight, I laid on the ground to get as far away as I could – wide angle lenses typically distort more than normal or telephoto lenses.
It also helped me keep my camera square and level to ensure that the lines remained even. The design was also a bit bold and busy, so I lowered the opacity to make it more subtle. Of course, this photo/mat combination is a little silly, but you get the idea.

Pulling From the Image
You can also just pull a pattern or design from the image you intend to frame. In order to do this, you’ll want to be careful of resolution. For my example, I also lowered the opacity again and applied blur to make the mat look like more like a texture than an actual image.
When printing your mats, carefully consider the type of paper you want to use. You’ll typically want to use a matte finished paper or even a thick card stock. You could even apply the image to a cheap piece of actual mat board using a light adhesive.

Matching the Walls
This technique is a bit of a visual trick. First, you’ll need to photograph the wall you intend to hang your photo on. Photograph it using the light that will most commonly illuminate it – preferably window light. This will ensure that the colors and texture will match most of the time. Then you’ll simply need to print the image to a large size and cut out a window for the photo you want to frame.
This will create the illusion that your photo is floating in it’s frame. Of course there are glass frames that can do this in reality, but this is more affordable, and can be further embellished in creative ways.

Posterizing Collections or Hobbies
There are a lot of places online that can print poster-sized images for relatively little cost. The paper is usually thinner than your typical photo paper, which is how they make up the price difference. But in a frame, the paper can look great. So get creative with what you shoot. I decided to posterize my collection of cribbage boards.
While I live in the U.S., part of my family comes from the U.K. where cribbage is a popular card game (that said, I’ve met some young U.K. residents who tell me that, like most cards games, cribbage is now mostly enjoyed by older people).

To make this image, I chose a dark background – a black-topped coffee table. I set up a softbox to achieve nice, even lighting. I used a step stool because, again, I wanted to be as far away from the subject to eliminate wide-angle distortion. You can see my set-up below, which I used for the next few demonstrations.

Using this technique, you could also photograph your favorite game or something similar. I did another shot here with dominos. Both the cribbage boards and the dominos are visually appealing, and could actually be displayed on the wall themselves! Unfortunately, a custom frame to do this will cost a lot of money and, once mounted on the wall, it would difficult to take them down to use them! You could also use this technique to display things that are too fragile or delicate to have hanging on your wall.

Literary Inspirations
I also love old books. I’ve got a small collection of first editions, and a lot of books that were given to me by friends and family. Sometimes books have great art and illustrations in them. One book that I own is a 50-year-old instructional book for ballet. I’ve photographed dance for a long time, and my girlfriend spent many years in her youth dancing. The book has very unique engravings in it, many of which could make great posters.
Obviously, reproducing copyrighted material is often times illegal. So creating this poster and distributing or selling them would be illegal. The image below shows an entire page with an engraving, and text that could be included on the poster.

You could also use illustrations from a children’s book. When photographing these books, I used the same lighting set-up that was used for the cribbage boards. I used binder clips to keep the pages as flat as possible, being careful not to damage the book. These could make a great addition to a child’s bedroom, blown up to a large poster size.

Overlaying Images
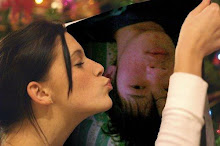
We all have snapshots of friends and family doing whatever it is that they do best. I have a few musician friends, and decided to use those photos to create this next image. When choosing or shooting these shots, you typically want the person to be well-lit and have some empty space around them to work with. We’re going to layer another image on top of it, and we want some space where that image will show through.
Start With Your Main Image
I’m going to be working in Photoshop to create this effect, but you could use some other photo editing program if it allows you to create layers and change opacities or create screens. I chose the image below because of the clear face and emotion along with the empty space around the subject.

Choose a Simple Graphic to Overlay
For the overlay, you want an image that is simple and graphic. It’s also easier if you have an image that isn’t dependent on a lot of color. You may end up converting it to black and white for use as an overlay. I shot an image of record to use as the overlay in the shot, but a guitar or some other instrument could work just as well. Obviously, you’d want to choose something that pertains to your subject.
When you have both images, open your main image in Photoshop and import your second image in as a second layer on top of the first. For the image of the record, I’m going to be deleting the center portion with the words and placing my subject inside the empty space.

Try Using a Screen Setting
Each image combination will be a little different. But first, try the screen blending mode setting. In order to do this, look in the layers control panel. There should be a drop-down menu set to “Normal.” Select this menu and change it to the “Screen” setting.
If the overlay looks really strange, try inverting the colors of the image by using the toolbar and clicking Image > Adjustments > Invert. Then apply the screen and see how it looks. Here’s what mine looked like, I didn’t have to invert it.

Using opacity changes
If the Screen setting isn’t working for you, there is another more controlled option. Open both photos in different layers with the detail shot on top, just like before. Delete any parts of the detail image that you don’t want, like I did with the center of the record. Then go back to the layers control panel and lower to opacity of the detail image until it looks good. You may want to increase the contrast of the detail image as well. I also selected the areas of the main image that are hidden by the record and increased the saturation drastically to help the color show through. Here’s what the effect looked like in my situation.

Slide Viewers
Slide viewers have been around for decades. Wait, let me clarify, they were around for decades until they stopped being produced. These are small, usually battery-powered, devices that were used to quickly go through a batch of slides. Some are bulky and pretty ugly, but some are super retro and great fun.
The one in the image below I found at a garage sale. Before purchasing these, make sure they take a type of battery that’s still made, and make sure the bulb works. Mine was designed to only turn on when a slide is held down into it, but it could easily be modified to stay on continuously.

Slide Projectors
Better yet, dive into slides completely and buy a slide projector. Some models which originally cost nearly $800 USD can now be found for around $100 or less. Although I haven’t seen one incorporated into a home décor, I imagine that one could be set up on a shelf and projected across the room onto a free wall space. I own a Kodak Ektagraphic that would work great for this.
Many of your photos might not be on slides at present, but you can easily convert them to slides by taking photos of your art using slide film.
Special Print Presentations
Of course, there are a hundred and one ways to put a regular photo on display. I’ve outlined some unique and interesting ways here, but there are many more. One of my favorites is having a “photo clothes line” somewhere in your home. Just hang a wire or length of thin rope on a wall, and clip your favorite images to it. You can change it all the time, and even customize it with lettering for special occasions. It can be a great way to show snapshots of a child or friend during a birthday party.
Another great way to display photos is using “photo clips” which allow you to join photos together at their edges. You can create 3-D structures, curtains or just simple rows and lines.

Conclusion
So what have we learned? Firstly, your camera is an art machine. Even if you don’t think your photos are worthy of being blown up to billboard size, you can find something to photograph that will make a great new piece of art for your home.
Secondly, your photos do not deserve to be relegated to photo albums, tucked away for no one to see. At least some of them should be out on display. So take some of these ideas, spice up your shots, and hang them with pride!


Tidak ada komentar:
Posting Komentar